How to Prevent Ice Dams, Snow Damage, and Moisture Problems on Roofs & Gutters
Posted by Steven on March 02, 2026
Winter is an enjoyable season for many people, thanks to holidays and seasonal activities. However, winter also brings cold temperatures, snow, and ice, which can be especially hard on your home. For homeowners, winter weather can wreak havoc on roofs and gutters, increasing the risk of snow damage and ice dams.
Ice dams, if left unaddressed, can cause serious and costly damage to your home. Below, you’ll learn what ice dams are, what causes them, how to remove them safely, and most importantly, how to prevent them permanently.
What Is an Ice Dam?
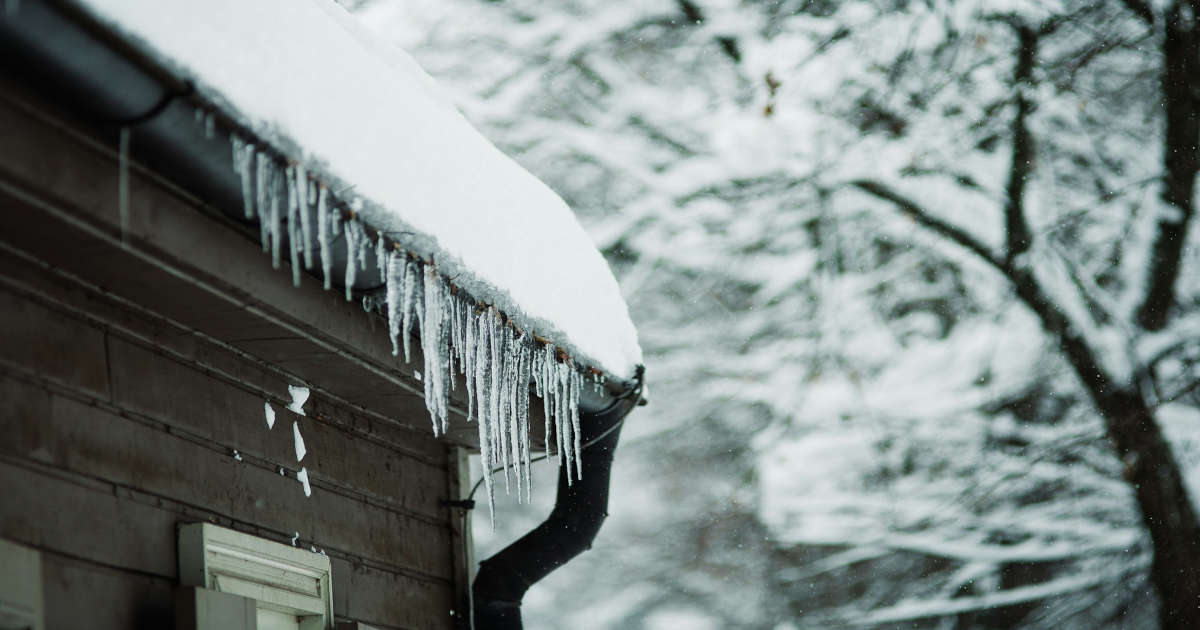
An ice dam is a thick ridge of ice that forms along the edge of a roof, typically near the eaves. As snow melts on the warmer sections of the roof, the water flows downward and refreezes at the colder roof edge. This ice buildup blocks proper drainage, forcing water to back up under the shingles.
Trapped water can seep into the home and damage walls, ceilings, insulation, and other structural components.
What Are the Effects of Ice Dams on Your Home?
When moisture enters your home, it can lead to mold and mildew growth, which may cause respiratory issues and other health concerns. Water intrusion can also weaken structural materials and lead to expensive repairs.
If you notice signs of moisture or leaking, it's critical to dry affected areas immediately and address the ice dam or water source as soon as possible.
What Causes Ice Dams to Form?
Ice dams form due to uneven roof temperatures. Heat escaping from the home warms the upper roof surface, melting snow. The melted water flows to the colder eaves, where it refreezes.
Common causes include:
- Poor attic insulation
- Air leaks from the living space into the attic
- Inadequate attic ventilation
- Outdoor temperatures fluctuate around freezing
- Clogged gutters that prevent proper drainage
How to Remove Existing Ice Dams Safely
If an ice dam has already formed, it's important to remove it carefully to minimize damage.
Use a Roof Rake
A long-handled aluminum roof rake lets you safely remove snow from the ground. Models with wheels are gentler on shingles. Always stand clear of falling snow and ice to avoid injury.
Cool Down Your Attic
If water is actively leaking, place a box fan in the attic and aim it at the underside of the roof where the leak is occurring. The cold air can help refreeze the water and slow the leak. This is only a temporary solution and should not replace proper repairs.
Try the Pantyhose Ice-Melting Method
Fill an old pair of pantyhose with calcium chloride ice melter and place it across the ice dam so it extends over the gutter. Use a garden rake or hoe to position it if needed. The calcium chloride will melt a channel through the ice, allowing water to drain off the roof.
How to Prevent Ice Dams Before They Form
One short-term preventive option is to install heated roof cables in a zigzag pattern along the roof edge. These cables help regulate roof temperature and improve drainage. For best results, install them before severe winter weather begins.
Permanent Solutions to Prevent Ice Dams
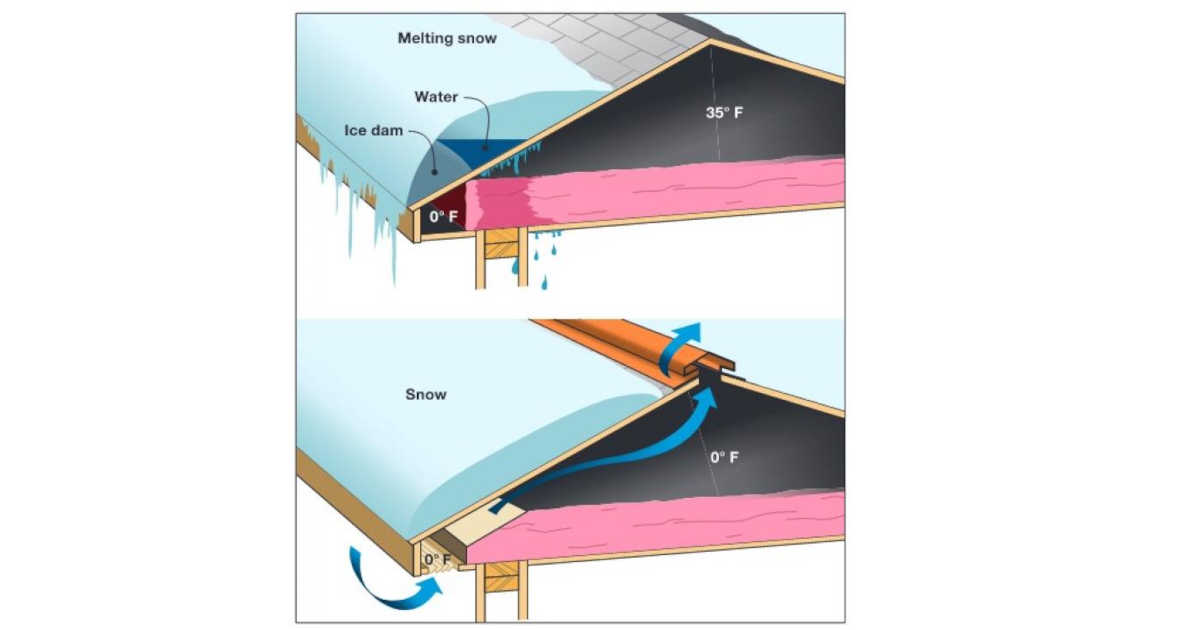
The most effective way to prevent ice dams is to ensure your roof surface stays the same temperature as the eaves. This requires proper attic ventilation, insulation, and air sealing.
Ventilate the Eaves and Ridges
A combination of continuous soffit vents and a ridge vent allows cold air to circulate evenly beneath the roof. The vents should provide at least 1 square foot of ventilation for every 300 square feet of attic floor space. Install baffles at the eaves to maintain clear airflow paths.
Seal the Attic Hatch
Unsealed attic hatches and whole-house fans allow warm air to escape into the attic. Seal these openings with weather-stripped covers made from foil-faced foam board and secure them with aluminum tape.
Ensure All Vents Exhaust Outdoors
Kitchen, bathroom, and dryer vents must discharge to the exterior through the roof or walls. Never allow these vents to exhaust into the attic or soffit.
Increase Attic Insulation
Proper insulation on the attic floor helps keep heat inside the living space. Check with your local building department to determine recommended insulation levels for your region.
Install Sealed Recessed Lighting
Older recessed lights release significant heat and cannot be safely insulated. Replace them with IC-rated, airtight fixtures that can be covered with insulation.
Install Flashing Around Chimneys
Seal gaps between the chimney and framing using L-shaped steel flashing and fire-stop sealant. Do not use spray foam or loose insulation near chimneys, as these materials are not fire-safe.
Seal and Insulate Ductwork
Apply fiber-reinforced mastic to all HVAC and exhaust duct joints. Then wrap ducts with R-5 or R-6 foil-faced fiberglass insulation to prevent heat loss.
Seal Remaining Air Leaks
Use fire-stop sealant around electrical wiring, vent pipes, and other penetrations. Look for areas where light shines through, or insulation appears darkened due to air movement.
Final Thoughts on Preventing Ice Dams and Winter Roof Damage
Ice dams are a common winter roofing issue caused by poor attic ventilation and insulation. They can lead to water damage, mold growth, and costly repairs if ignored. Temporary solutions like roof rakes, fans, and ice melters can help in an emergency, but permanent prevention requires proper ventilation, air sealing, and insulation.
By addressing these issues, you can protect your roof, gutters, and home from winter damage and enjoy the season with peace of mind.
Please Note: If you're dealing with leaks or other roofing issues, it's essential to consult a professional contractor. A thorough inspection can help identify the root cause and prevent further damage, ensuring the longevity and safety of your home.