Gable Vents: The Ultimate Guide to Attic Ventilation, Airflow, and Installation
Posted by Steven on January 26, 2026

Why Attic Ventilation Is Important
Without adequate ventilation, your attic can trap excess heat and moisture, leading to higher energy bills, a shorter roof lifespan, and potential structural issues like mold and wood rot. Proper attic ventilation promotes steady airflow expelling warm, humid air in the summer, minimizing moisture buildup in the winter, and bringing in cooler, fresh air year-round. One of the most cost-effective ways to improve attic ventilation is by installing gable vents.
What Are Gable Vents?
Serving as both intake and exhaust vents, gable vents are louvered openings that allow air to flow through the attic. They are installed near the peak of a gable roof. For proper ventilation, you'll need two gable vents, one on each end of the attic. Fresh air enters through one side and pushes hot air out the other.
Gable vents are available in various sizes, colors, materials, and shapes, including round, half-round, octagon, triangular, rectangular, and square.
Types of Gable Vents
Below is a visual aid for the different types of gable vents.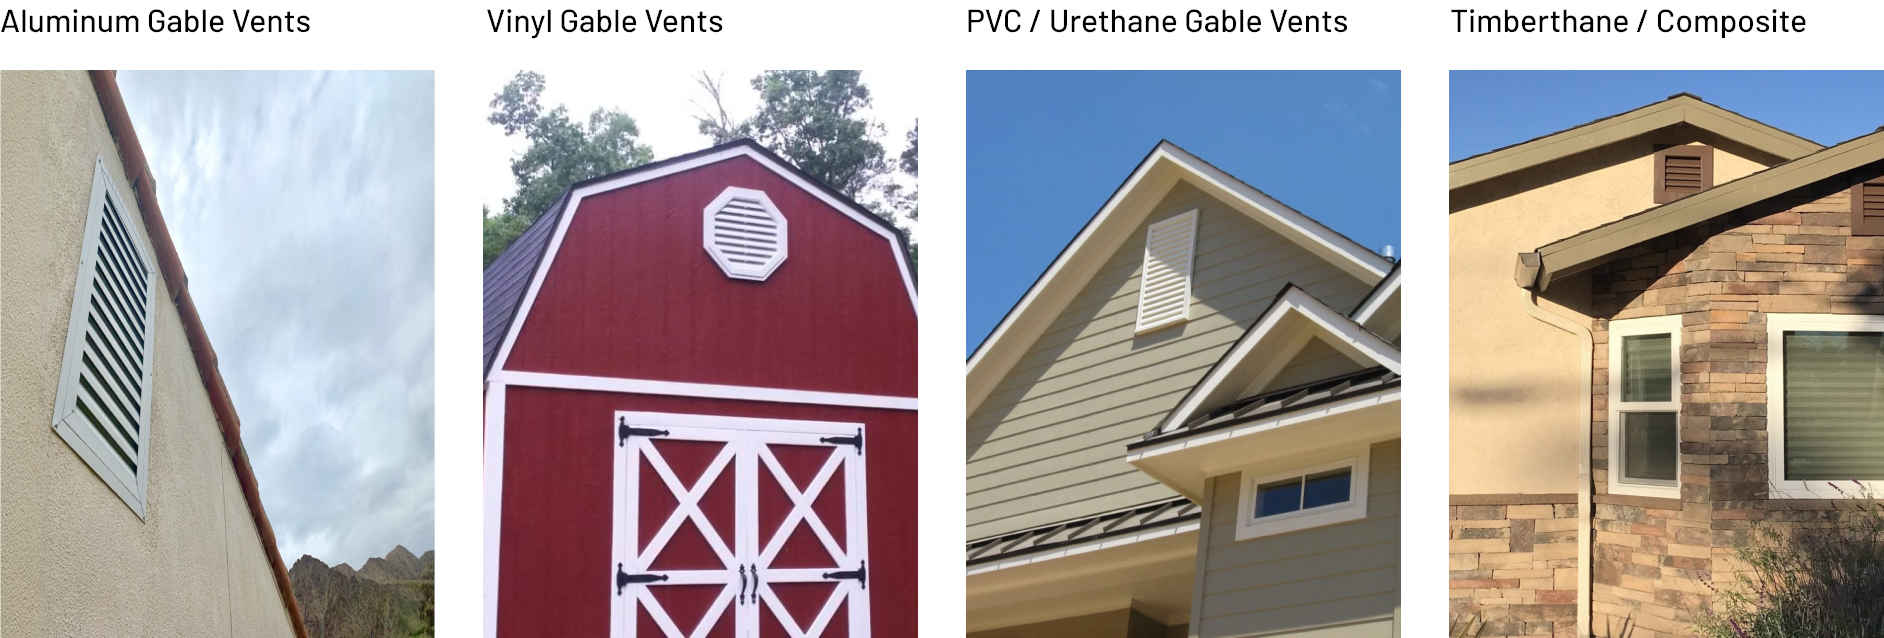
Gable Vents vs. Other Ventilation Options
Gable Vents vs. Soffit Vents
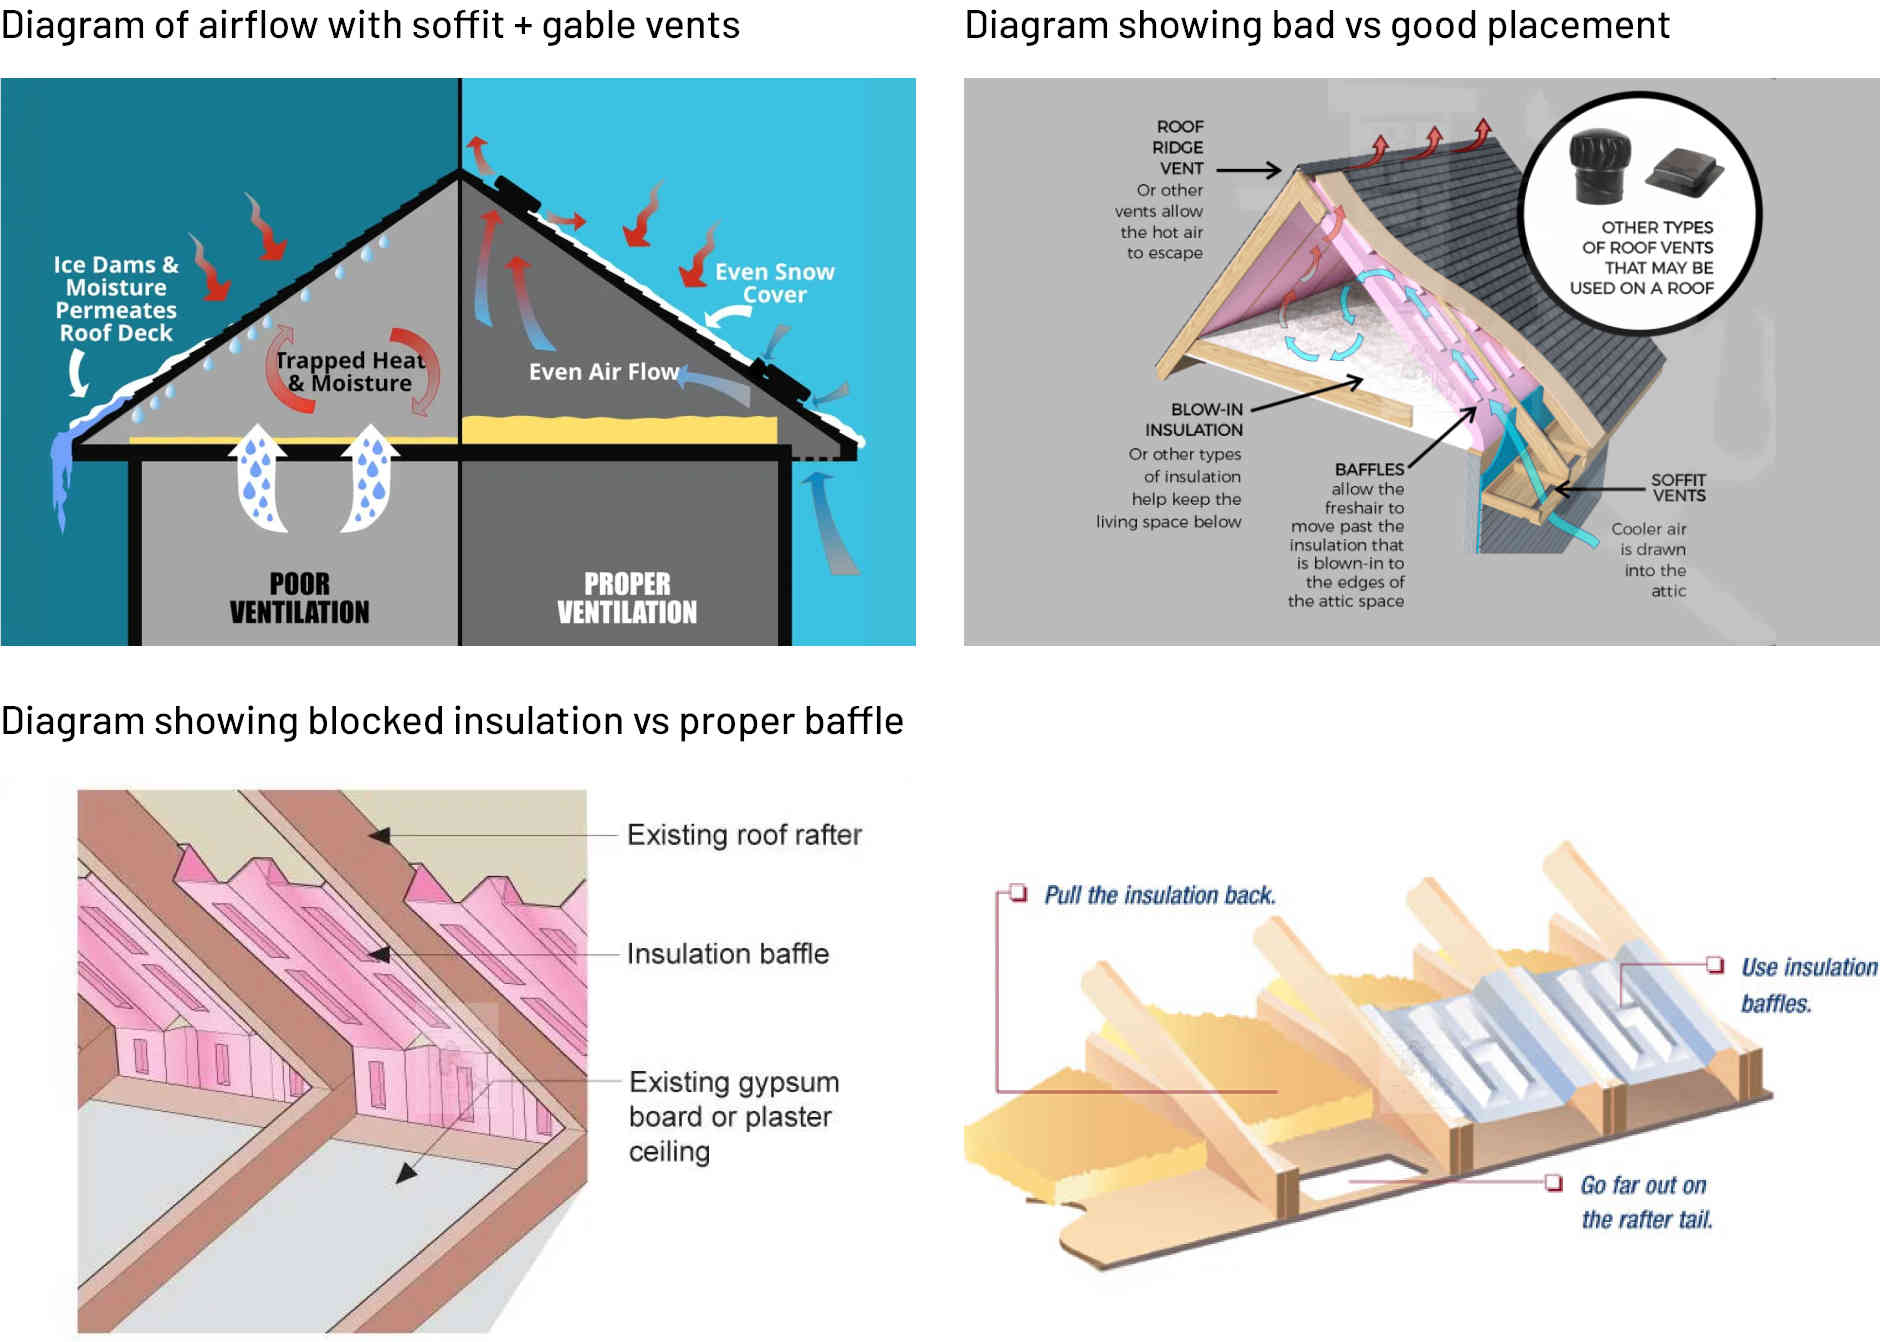
While gable vents are installed on the sides of the attic, soffit vents are located under the eaves. Soffit vents draw cool outside air into the attic. When used together, gable and soffit vents create continuous airflow. Cool air enters through the soffits and forces hot air out through the gable vents.
Gable Vent vs. Ridge Vent
Another common ventilation option is the ridge vent, which runs along the peak of the roof. Installing a ridge vent involves cutting into the roof decking, adding flashing, and installing a ridge cap. While ridge vents are highly effective, they are typically more expensive to purchase and install.
Can You Combine Gable and Ridge Vents?
Gable vents work well with soffit vents, but not with every other type of vent. Avoid combining gable and ridge vents, as this setup can reduce airflow efficiency and defeat the purpose of both systems. If you plan to add a ridge vent to a home that already has gable vents, be sure to block off the gable vents to maximize the ridge vent’s performance.
Are Gable Vents Right for Your Home?
For most homes, gable vents provide a cost-effective and reliable ventilation solution when installed correctly. They efficiently move hot air and are certainly better than having no ventilation at all.
How to Measure for a Gable Vent
Before purchasing a gable vent, determine the size you need using the following steps:
Step 1: Measure Your Attic Floor
Measure the length and width of your attic floor in feet, then multiply them together.
Example: 25 ft × 35 ft = 875 sq. ft.
Step 2: Determine How Much Ventilation You Need
A general guideline is 1 square foot of ventilation for every 150 square feet of attic space.
Example: 875 ÷ 150 = 5.83 sq. ft. of total ventilation area (round up to 6 sq. ft.)
Step 3: Split Between Intake and Exhaust
Divide the total ventilation area evenly between intake (soffit vents) and exhaust (gable vents).
Example: 6 ÷ 2 = 3 sq. ft. of gable vent area
Step 4: Convert to Square Inches
Since 1 square foot = 144 square inches:
3 × 144 = 432 square inches of required gable vent area.
Note: Local building codes may specify different ventilation ratios. Always check your regional requirements before finalizing vent sizes.
How to Install a Gable Vent
Once you've measured your attic and selected the appropriate vent, you're ready for installation. Although instructions may vary by manufacturer, here's a general overview:
Step 1: Prepare the Area
- Measure and mark the vent opening dimensions on the gable end wall.
- Make the opening slightly larger than the vent frame for a proper fit.
- Clear away any obstacles and clean the surface.
- Remove any siding covering the marked section.
Step 2: Cut the Opening
- Using a saw, carefully cut along the marked lines.
- For hard siding materials such as stucco, use a circular saw with a masonry blade, then pry out the cut section.
- Once the opening is cut, remove debris and smooth any rough edges.
Step 3: Install the Vent
- Insert the gable vent into the opening, ensuring the flange sits flush against the wall.
- Secure the vent with screws through the flange either from the interior or exterior, depending on design.
- If your vent comes in multiple pieces, install the backing or screen first, then attach the outer grille (some models snap into place).
Step 4: Seal and Finish
- Apply a bead of exterior-grade caulk or sealant around the vent’s outer edge to block air and moisture.
- Use tape or flashing to seal the flange along the top and sides, but leave the bottom unsealed to allow water drainage.
- If desired, paint or finish the vent to match your home’s exterior.
Best Gable Vents By Climate
The best gable vent for you depends on the climate. Here are the best gable vents by climate.
- Humid/Coastal: Aluminum or PVC
- Cold Climates: Insulated vents + insect screens
- Hot Climates: Larger vents + ridge vent combo
- Forested Areas: Vents with pesh mesh
Visual Diagrams
Here are some visual aids for gable vents.
Conclusion
Your home's defense system is only as strong as its weakest point, and for many houses, that's an improperly ventilated attic. As we've detailed, the consequences go far beyond high energy bills; they include the structural decay from wood rot and the serious health risks posed by toxic mold. Installing gable vents isn't just a home improvement project; it's a critical measure to protect your property and your family's well-being. Don't wait for the subtle signs of damage to become a major crisis. Take the first step toward a healthier, more secure home today by assessing your ventilation needs and safeguarding your attic from the silent threat of moisture.