Choosing The Right Window Shutter
Posted by Steven on December 09, 2024
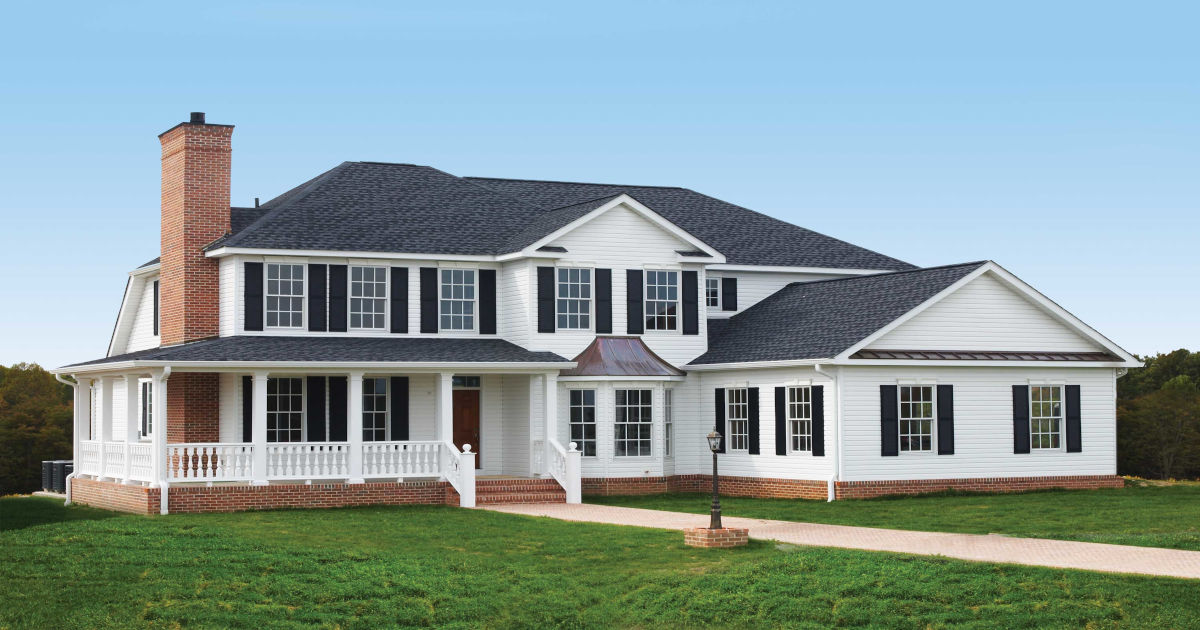
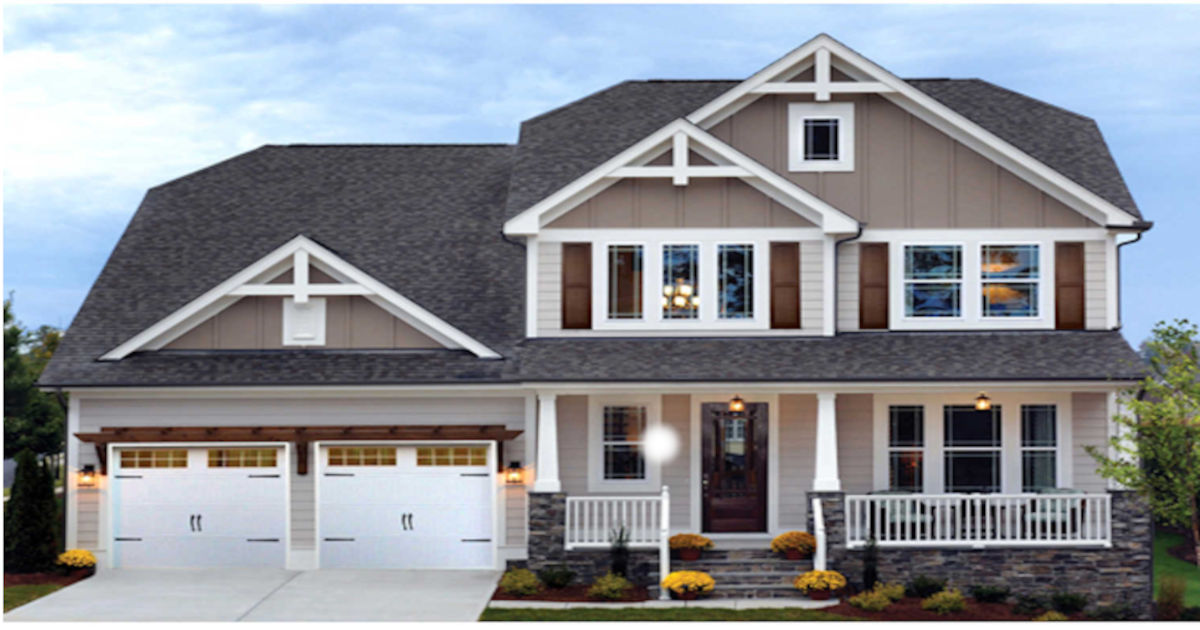
Decorative window shutters add appeal to the exterior of your home. Previously, people bought functional shutters to keep out the weather. However, since home window panes are standard, most people no longer purchase functional shutters.
Decorative shutters are sold in different styles, sizes, colors, and materials. Here are some tips and basic information on selecting a window shutter, and installing it.
Basic Shutter Styles
When choosing shutters, choose the style that best matches your home. Below are the three popular American shutter styles.
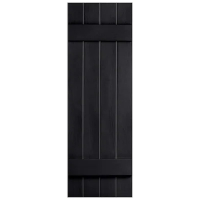
Board & Batten
Board & Batten offers a simple design that is compatible with several building styles. These shutters feature long vertical board strips held together by horizontal boards. They can be found in barn-style homes, beach cottages, country bungalows, Tudor homes, Mission-style homes, and cabin homes.
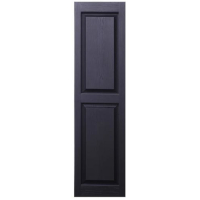
Raised Panel
Raised Panel shutters are closely associated with the popular colonial exterior style. In addition to solid panels, these shutters have a deep definition, enhancing curb appeal from any angle.
Open Louver
Open Louver shutters are an arrangement of overlapping slats. Originally, people used louvers to keep out rain while letting in air. This popular shutter style adds a heritage look to a home's exterior.

Shutter Materials
When selecting shutters for your exterior, choose the material that works. Below is an overview of different shutter materials and their benefits.

Vinyl Shutters
Vinyl shutters are the cheapest shutters on the market. They are made from a thin layer of vinyl formed around a mold. The downside of vinyl shutters is they break, fade, or crack more than other materials, meaning they need to be replaced more often. Vinyl shutters are lightweight, which makes them easier to install. This makes them perfect for vinyl siding.
Natural Wood Shutters
Natural wood shutters are typically made of cedar or pine. Cedar is a durable material that can withstand heavy wind. Natural wood is a good environmental choice because it is chemical-free. Wood shutters are customizable with stains and colors. These shutters can last long if maintained properly, but they are susceptible to rotting, mold, and termites. They are also the most expensive.
Composite Shutters
Composite shutters are made of man-made wood that looks real but is resistant to rot, mold, and termites. They typically last twice as long as natural wood. Composite is a durable material that does not crack or split.
PVC Shutters
PVC Shutters are of higher quality than vinyl and composite shutters. While they look and feel like wood, they are made from durable, lightweight, and customizable plastic. Due to its oxidation resistance, it has a long lifespan. The only downsides to PVC are that it can warp at high temperatures and does not handle black paint well. PVC shutters do not need to be primed.
Polyurethane Shutters
Polyurethane Shutters are factory-primed and ready for staining or painting. They are available in non-penetrating gel stains or acrylic latex paints. Their durable polyurethane construction resists insects and moisture and won't warp, crack, rot, or split.Choosing Your Shutter Size
When choosing the size of your decorative shutters, it's usually easiest to use the same size for every window. The shutter should be between 25 and 33 percent of the total width of your window, including the trim. For example, if the width of our window is between 24 and 28 inches, the width of the shutters should be 12 inches. To determine shutter height, measure the window trim from top to bottom. Leave a 1/4-inch gap to allow the vinyl material to expand and contract if there is a sill at the bottom.
Choosing Shutter Color
The color of your window shutter impacts your home’s exterior. Shutters often function as an accent color to the exterior color scheme. Black is the most popular color choice because it fits any exterior color. White is the second most popular choice for the same reason. Whatever color you choose, make sure it supports the home's color palettecolor palette.
If you need help deciding color, consider purchasing color samples to experiment.
Installing The Shutters
After you have chosen your shutters, it’s time to install them. To do this, follow the steps below.
1. Position Shutters
Position the shutter next to the window. The bottom rail on most shutters is wider than the top. Remember to leave a 1/4-inch gap between vinyl or composite shutters. Make sure the shutter is level, and mark the outside corners with a pencil.
2. Drill Holes
Lay the shutter on a flat surface and mark locations for the mounting holes. Measure 2 inches from the top and bottom in the center of both side rails. Shutters that are 44 inches or taller typically require six fasteners. You should place one near each corner and two more in the middle of the side rails. Pre-drill holes at each reference mare with a 1/4 inch bit.
3. Drill Pilot Holes
Mounting hardware is usually included with shutters. To drill holes for the fasteners, reposition the shutters on the wall and drill 3 1/4 inches into the wall. You now have 1/4-inch pilot holes drilled into the shutter and the wall, at this point remove the shutter from the wall and enlarge each hole in the shutter with a 3/8-inch drill bit.
4. Install Shutters
Finally, you are ready to install the shutters. If using shutter locks or fasteners, push the fastener to the pilot holes in the shutter into the wall. Tap the fastener with a hammer to ensure the shutter is firmly attached to the siding. Avoid over-tightening the fasteners because it could create warps or dimples on the surface.
If using metal screws, pre-drill holes through the shutter with a multi-purpose 11/64 inch bit. These holes will be a reference mark for the screws. After placing the shutter on the wall, drill 3 1/4 inches into the wall surface as you would when installing with fasteners. Remove the shutter and enlarge the hole with a 5/16-inch drill bit. Put the shutter back in place and insert the screws in the pilot holes. Tighten the screws with a screwdriver.
Conclusion
Decorative window shutters add the finishing touch to the exterior of your home. Choose the style and color that is most visually appealing to you. Select a material that suits you best. Measure your windows to ensure you choose the correct shutter size. Follow the steps carefully to install your shutters without warping them. With this guide, you should be ready to purchase Shutters & Shutter Accessories.